
Death, Taxes and Tourists – a Photoshop technique
You know the old adage of the two truths in life – well, I think there are actually three! The third, of course, being tourists that are always getting in the way of your nice pictures. Believe me, with all the travel that I do, it happens way too often. Thankfully, Photoshop CS3 has a brilliant way of removing the tourists. I show this in almost every demo stop, and was recently asked if I could write up the technique – so, here it is.
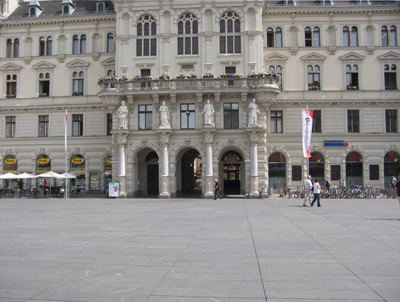
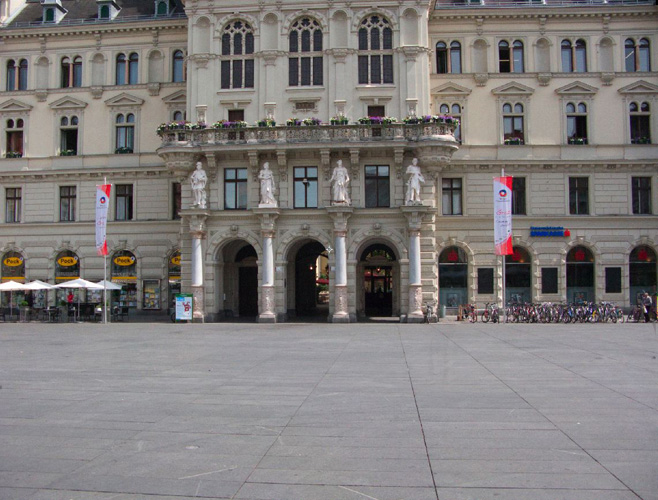
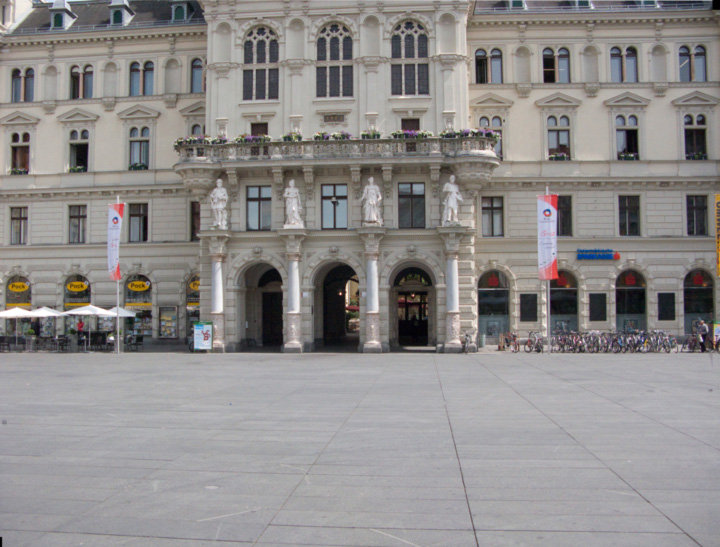
Obviously, the first thing that we need are a few photographs. Here are three pictures that I took in front of the Graz city hall, and as you can see, there is a tourist in every one of my pictures, basically ruining the shot. The other thing that you might notice is that all of the pictures were taken without a tripod (I’m not dragging one all of the world with me!), because the framing of each shot is different.

Tourists…
…tourists…
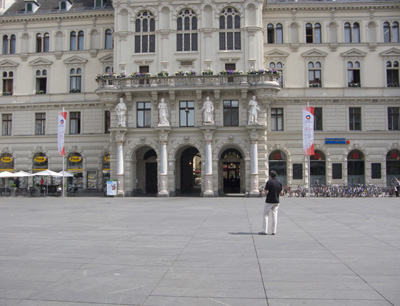
…and more tourists!
The first step can be done manually in Photoshop, or automatically via Bridge CS3. I like the automatic mode, so, I’ll start by selecting the three images in Bridge. Then I only need to choose Tools>Photoshop>Photomerge. The Photomerge command is not new, but has been completely redesigned in CS3. You’ll notice on the left hand side of the dialog a series of possibilities for aligning all of the pictures. This will tell Photoshop to analyze the pixels in each of the pictures and line them up. Quite honestly, I’ve never used anything but the Auto option. :-)
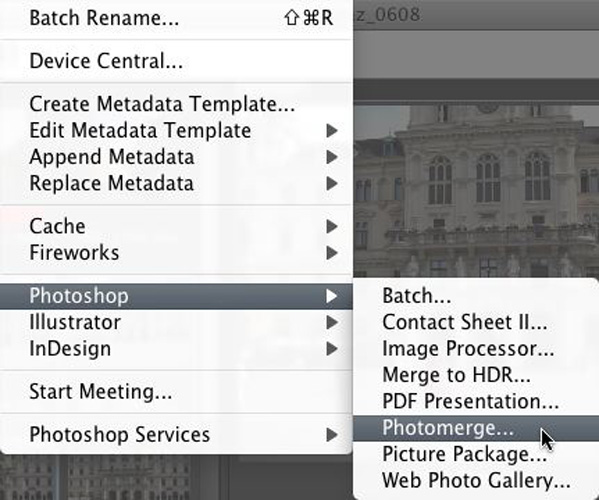
The new CS3 Photomerge command
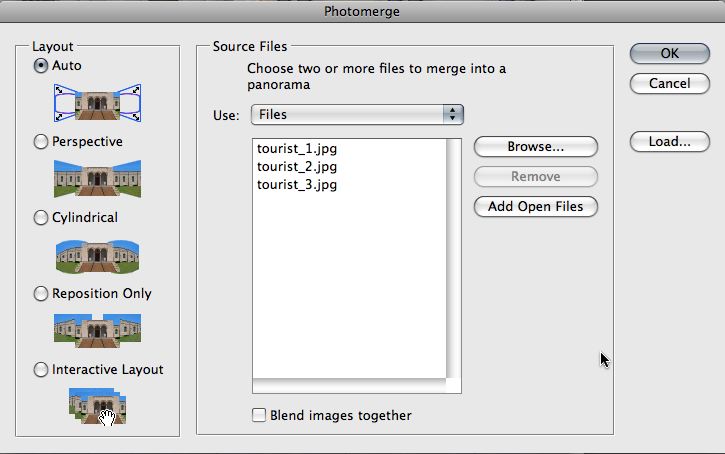
The Photomerge dialog – remember to uncheck the Blend option
The one thing that we do need to do in the dialog is to uncheck the “Blend images together” option at the bottom of the dialog. (This option is used when you are creating a panorama – to automatically analyze the lighting of each picture and blend the pictures together to remove any seams in the panorama.)
Photoshop will now create a new document, place each image on its own layer and then analyze and align each image. If you show/hide the individual layers, you can see that they are all properly aligned. (Btw, I’m always impressed by this – Photoshop is simply amazing!)
Now, of course you “could” simply make a bunch of masks to remove the tourists, but why waste time doing that (unless you get paid by the hour, of course)?! With all of the layers selected, we’ll now turn them into a single Smart Object by choosing Layer>Smart Objects>Convert to Smart Object.
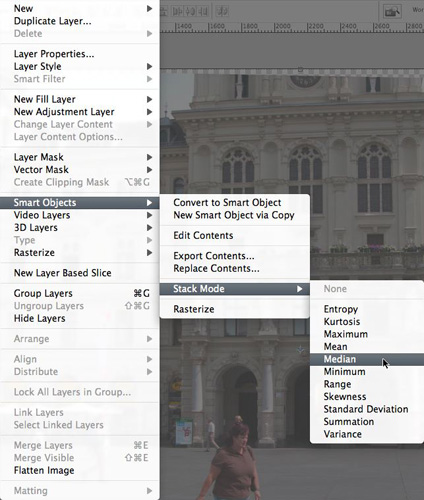
The Median Stack mode eliminates the pixels not present more than 50% of the time.
Finally, it’s time to kill…, er…, remove the tourists. Select Layer>Smart Objects>Stack Mode>Median. And like magic, the tourists are gone!
Tourists are gone… almost
I know you’re thinking to yourself, how did it do it?! Well, the answer is in the Stack Mode that we selected. This command tells Photoshop to analyze all of the images in the stack, and locating the pixels which are not present more than 50% of the time and remove them – leaving the pixel that is in that spot more than 50% of the time. Take a look at the original three images again. I’ve gone into the Smart Object and given the top two layers 50% so that we can see “through” all of them. You’ll notice that each section of the building is visible in 2 of the 3 images – ie, in more than 50%. That’s how the magic happens.
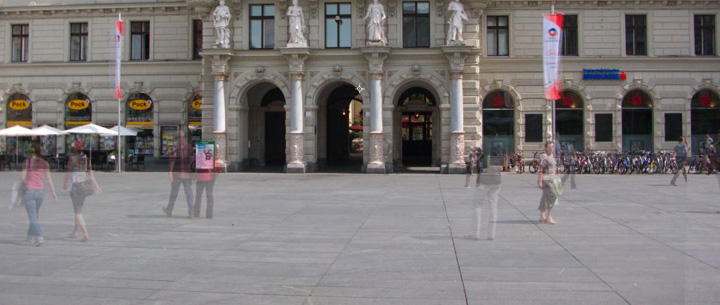
Make sure that none of the tourists overlap in any of the pictures
And that’s also the key to successfully using this feature. When taking the photos, I had to ensure that I never had someone standing in the same place more than 50% of the time. Since it wasn’t crowded that day, it wasn’t difficult – but you can imagine that on a crowded day, this could be next to impossible. So, in other words, this feature is really impressive, but it won’t solve every situation. But the rule of thumb should be, take enough images to ensure that you will have something to work with – the more, the better.
Finally, in the spirit of honesty, my final picture is not perfect… As amazing as the technology is, it’s not always perfect. You’ll notice – if you look real close – that I’ve got a little bit of the pants of one of our tourists, “ghosting” through in the final image. Something that we couldn’t control or correct is that the gentleman’s pants color matches some of the pixels in the concrete close enough that Photoshop has left them. If this picture is simply being shared on the web, it’s probably no big deal. But if we want to use the photo in a professional context, we need to finish the cleanup.
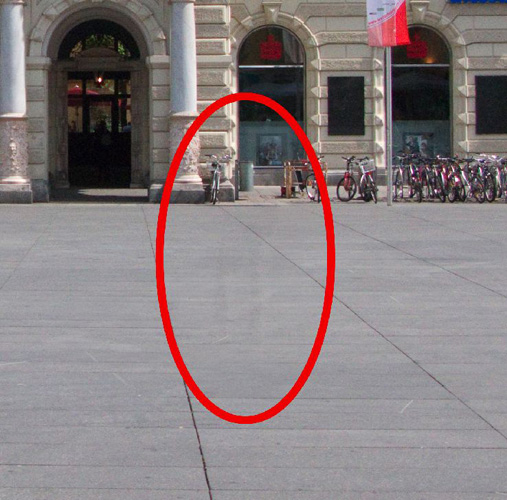
If you zoom in, you can see some ghostly legs in the picture
This is thankfully a very simple process, using masking techniques that you are probably already be familiar with. First, flatten the Smart Object in the Layers panel, by right-clicking and choosing Rasterize Layer. Next, create a new layer below (and that’s the import part) the flattened layer and place an image in which the “ghosted” area is clean – for me, that is the tourist_2.jpg image. Select both layers and choose Edit>Auto-align Layers. Finally, create a mask on the top layer and simply paint out the little bit of ghosted pixels.
The perfect picture!
And that’s it! Hope you’ve learned something – and even better, you’ll never have to worry about getting the perfect shot! Just take three or more images and you’ll be guaranteed to be able to “make” a perfect shot, and in far less time than it used to take! Cheers!
July 22nd, 2008 at 7:42 pm
[...] good news is Greg has documented the technique on his blog so go and check it out. Nice one [...]
July 22nd, 2008 at 7:47 pm
Hey Greg,
That’s so cool! Thanks for documenting the technique. I’m going to have to get more memory cards for my digital camera now though!
Cheers,
Simon